How To Spot Fake Jordan 1 Retro High CO.JP

Jordan 1 Retro High CO.JP authentication is not an easy task, even for an experienced fashion lover. If you want to know the most reliable methods of legit check for this pair, follow this manual! And, in case you need some more help, LegitGrails got your back with our brand item verification service.
Are you interested in other new Jordan models? Check out our latest guides here: Jordan 5 Retro Off-White Sail, Jordan 1 Dark Mocha.
Table of Contents
[ open ]Fake Jordan 1 CO.JP - The Overall Shape Method
When it comes to Jordan 1’s, their unique silhouette can not be mistaken for any other. The key elements that make their form so unique are the toe box, the heel, and, of course, the Swoosh.
The Swoosh should have a very sharp, pointed tip. In case with this Jordan 1 CO JP replica the tip is more thick, and overall the Swoosh is more bulky. It can be seen around the stitching area.
The toe box of the authentic shoe is slightly more prolonged and has a subtle downward slope, whereas the fake has a less elegant shape with almost vertical slope.
The heel, finally, has a straight form, whereas the fake Jordan 1 pairs usually have it more curved and have a little bump on the rear side.

Jordan 1 CO.JP legit check - The Swoosh Method
Right now we are going to focus on the shape of the Swoosh in a bit more detail.
Please, pay attention to the little stitched line that separates the Swoosh in 2 parts. It is pretty easy to see that this line should have thicker and wider stitches in comparison to the replica. The size of the stitches is a very important detail that we will be pointing out a lot later on.
Secondly, be aware of how the real Swoosh is slightly longer than the fake one, and it is also placed higher, because it is closer to the shoelace holes.
Finally, take a look at the texture of the leather. The replica has more wrinkled leather texture, while the original is more smooth, with less prominent wrinkles.

Verify any branded item in
3 simple steps
Choose response time & upload photos
Wait for our team’s review
Get the verdict and personal certificate
Air Jordan
authentication service
-
authentication success rate >99.3%
-
item is reviewed by 2-4 specialists
-
relied on by over 100K users
Takes as little as
30 minutes
Authenticate your branded items
with Experts & AI
rated 4.5/5.0 by more than 100,000 customers


featured by


Jordan 1 CO.JP authentication - The Air Jordan Wings Logo Method
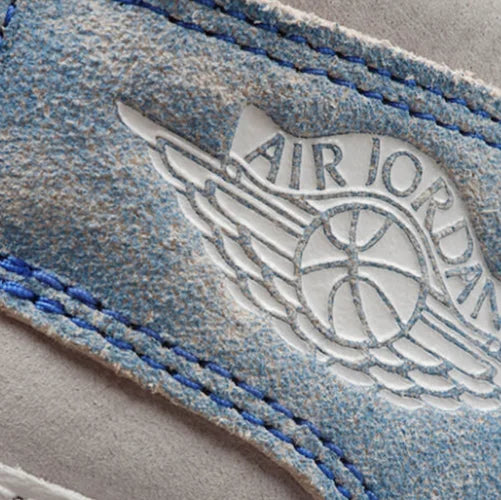
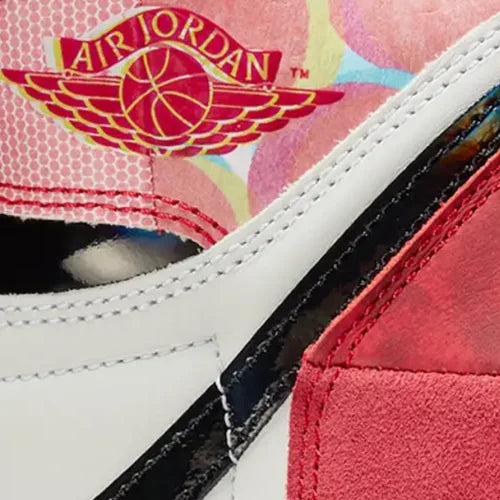
The most noticeable flaw in this fake Jordan 1 CO JP is that the logo touches the borders around it, especially the bottom border. In authentic pairs, the logo should be perfectly centered within the borders.
The next thing to observe here is the font. If you look at the fake, the letters are thinner than the original, and so are the spaces between the characters. The lines of the logo follow the same pattern, being overall thinner and less distinct than in the original.
The stitching can be incorrect in some fake pairs. In our fake VS real Jordan 1 CO JP comparison picture below, it is shown in the area marked by the circle. The stitching in this area should form an angle, whereas on the fake pair it does not.

Replica Jordan 1 CO.JP - The Heel Method
When it comes to the heel, a signature element of every Jordan 1 pair is their hourglass shape. So make sure the rear side of your pair gets thinner in the middle, while being thicker at the top and the bottom.
Once again, let’s examine the stitching. As we discussed in one of our previous steps, the fake stitches are smaller and shorter, therefore, overall less visible.
Lastly, the sockliner shape is also something you shouldn’t forget about. As you can see, the top of the heel of the authentic has a smooth shape with a slight bump in the middle. The replica has this bump looking more sharp, prominent, and not symmetrical.

How to spot fake Jordan 1 CO.JP - The Outsole Method
As for the outsole, pretty much the only thing you must be aware of is the logo in the middle. You must make sure it is positioned right in the middle of the outsole tab. Many replicas, including the one you can view below, have the Nike logo placed too high or too low. In this case it is too low.
Now, the logo itself is also a lot smaller than it should be. It makes some small symbols appear illegible, such as the ® trademark sign.

Real VS Fake Jordan 1 CO.JP - The Tongue Logo Method
For this method, we decided to showcase both colorways of this new model, which are called Neutral Gray and Midnight Navy.
The Neutral Gray comparison shows the difference in font and stitching. The letters here are more squeezed together compared to the authentic version, and the stitches are shorter and smaller. The font is also slightly thinner.

Now, the Midnight Navy pairs show an interesting flaw in the replica pairs. This flaw is the density of threading in the logo. The authentic Nike text has quite dense stitching, whereas the replica Jordan 1 CO Japan is not as thick. Apart from that, you can clearly see how the lines are much more fuzzy and not distinct, without clear borders.

Jordan 1 CO.JP fake - The Inner Tongue Logo Method
Tp inspect the inner tongue logo, you have to remember the proportions of the Jumpman. In this replica his silhouette is smaller and thinner, especially at his arms and waist.
The dimensions of the tag are also wrong here, the fake being taller and thinner in width. The stitching method is also great to use here. As we pointed out before, the stitches should be longer, and, most importantly, proportional to each other.

Jordan 1 CO.JP Fake VS Real - The Size Tag Method
The size tag is, perhaps, the most frustrating detail to authenticate, because it requires dealing with a lot of small text and details. We totally understand if you do not want to deal with it alone. We’re here to help with our Jordan legit check service.
In the meantime, focus your eyes on the made in China text on the bottom left part of the tag. This text will immediately help you spot some flaws of the replica. For example, the letters of the authentic are tightly spaced together, whereas the fakes are wider and further apart.
Next, check the US size text in the upper left corner, as it also can serve as a great indicator. In case with the fake Jordan 1 CO JP the size is typed in bigger letters. It also looks like it’s placed closer to the border of the tag (or the end of the black line).

Legit check Jordan 1 CO.JP - The Insole Method
Finally, we’re getting to the end of our list. The last thing to cover is the insole. Luckily, it’s just 2 things to notice here - the Jumpman logo and the pattern of the sole.
The Jumpman form is, once again, incorrect. He looks thinner and smaller, and his limbs are slightly out of proportion. This is especially true for his left arm and the ball in his hand.
As for the pattern of the insole, the fake one has a subtle stripe pattern. The original insole does not have such a pattern, and is just a solid color without any texture.

How can I authenticate Jordan 1 CO JP?
The methods are pretty simple if you are familiar with the basic Jordan authentication methods. Mainly you should pay attention to:
- The swoosh
- The stitching all around the shoe
- The logos
Where do I get my Jordans professionally authenticated?
To get rid of any doubts about the authenticity of your shoes, reach out to our team. We provide excellent legit check services for all fashion brands. Check them out here: Jordan legit check.
See If Your Jordan 1 Retro High CO.JP Are Authentic
Verify any branded item in
3 simple steps
Choose response time & upload photos
Wait for our team’s review
Get the verdict and personal certificate
Air Jordan
authentication service
-
authentication success rate >99.3%
-
item is reviewed by 2-4 specialists
-
relied on by over 100K users
Takes as little as
30 minutes
Authenticate your branded items
with Experts & AI
rated 4.5/5.0 by more than 100,000 customers


featured by


